
🇫🇷 see french version here 🇫🇷
While quite challenging, this is one of my favorite fall/winter hikes in the Whistler region. This trail features a blue lake (covered in snow in winter), a glacier, and incredible views over the valley. In winter, I would rate this hike as difficult, only go if you are well prepared for winter backcountry hikes (gear and training).
In summer, the turquoise waters of Wedgemount Lake make it one of the most popular day hikes around. That’s why I prefer winter: the quiet up there makes this hike so special.
Be aware of avalanche forecast, always check the conditions before you go.
Photos in this post were taken on November 24th, 2019
Who is it for?
🔸 Glaciers lovers
🔸 People in good physical condition, the terrain can be challenging (steep, icy)
🔸 People who have already hiked in winter and tried their gear
🔸 No need alpine or rock climbing experience

Summary
🔸 Location: Garibaldi Provincial Park, BC
🔸 Distance: 14 km out & back
🔸 Gain elevation: 1300m
🔸 Time (winter): 6 – 9 hours depending on trail conditions and your pace
🔸 Features glaciers and a turquoise lake
🔸 Camping: Camping is permitted at designated campsites – book on BC Parks website. There are pit toilets as well as an emergency shelter at the lake.
🔸 Dogs are not allowed in Garibaldi Provincial Park.
The route
The first part of the trail is in the forest. We walk along Wedgemount Creek for a while, there are also some pretty waterfalls on the right of the trail. After about 2 hours of walking you arrive on open, more rocky terrain. A layer of snow has formed on the trail, sometimes you have to make your way through the rocks, you can’t see the ground. The trail is however well marked on the trees, difficult to get lost. The snow-capped cliffs in front of us are impressive, it is the first snow of the year which settles on the forest, and we are already in a magical landscape.
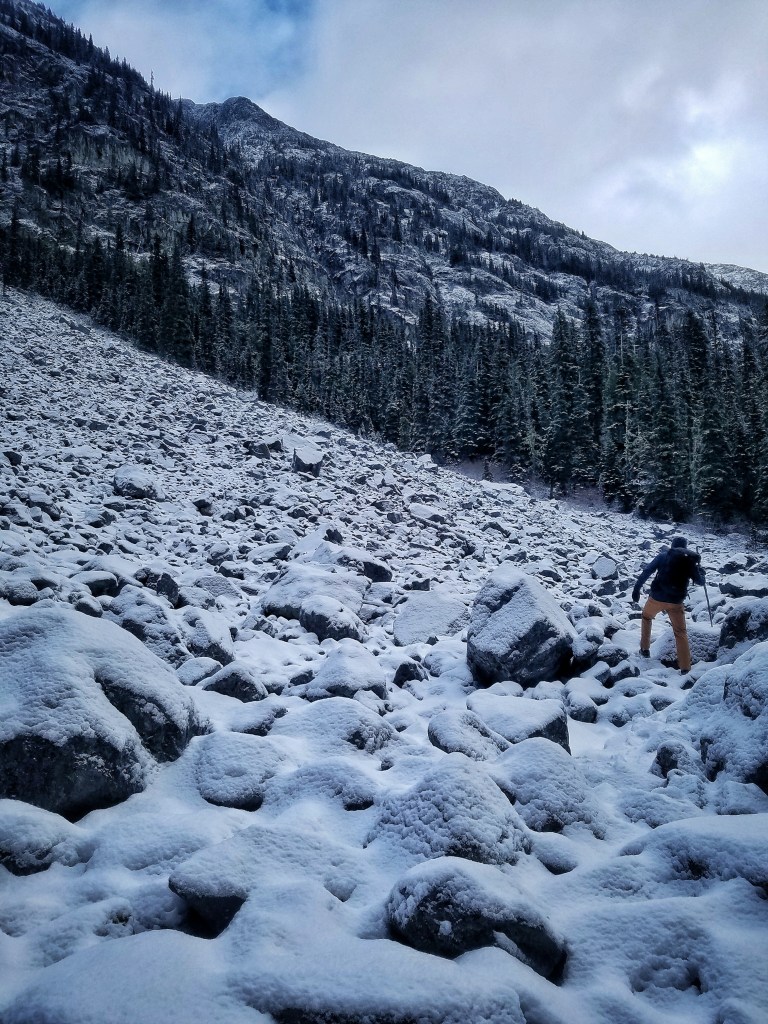

The last kilometers before reaching the lake are quite difficult. Some portions are icy, you have to put the microspikes on to avoid slipping and injuring yourself. There are few hikers on this trail at this time of year, we just see a few of them during the day. After 4 hours we finally arrive at the lake. The snow and the lack of adequate equipment – the poor quality microspikes did not hold up – slowed us down well.
The lake is frozen, covered by a thin layer of snow. It’s windy, and it’s starting to snow again. We take refuge in the cabin to try to warm up and have a bite to eat. We share this shelter with 4 Canadian hikers, visibly better equipped for the extreme cold than us. After a good break, we decide to walk along Wedgemount Lake to go to the glacier. We move forward in the fog, which reinforces the mystical atmosphere of the place.


The glacier is a brilliant blue. Two hikers are perched on one side of the glacier. We prefer to stay down and admire it from a little further. It’s time to go back down a few photos later if we want to be back at the car before dark.
The way down is much more complicated than the ascent. With only one crampon – of inferior quality moreover – I can hardly not fall. I must admit that I spent a few sections on the buttocks, in human sledding mode.
We will have taken about 9 hours round trip, including the breaks. Exhausted, we take the road to Vancouver – always fun to drive 2 hours in the middle of a snowstorm after a day of hiking.

My feedback
I loved this hike, it was very emotional, and it was well worth the strenuous climb. The glacier was the highlight of this trail, the lake being covered in snow at that time.
It was also an opportunity to realize how vital quality gear is, even for microspikes or simple trekking poles. Although we were well prepared physically and checked the weather conditions carefully, we had not invested enough in quality gear, which quickly makes the difference in the mountains. It is essential to learn from your mistakes and continuously improve yourself to stay as safe as possible.
Also, I did this hike in winter conditions, but it was the beginning of winter, the first snow was falling that week. The trail was icy, but there was no deep snow, and the avalanche risk was low. Before considering it in the middle of winter, you have to find out about the conditions and go with someone experienced. I strongly advise following an avalanche training session before planning backcountry hikes.


What to bring?
The 10 essentials ~ to bring for every single hike you do :
🔸 extra layers – waterproof clothes
🔸 extra water + water filter system
🔸 extra food
🔸 headlamp + spare batteries
🔸 navigation: map, compass, altimeter, GPS device, personal locator beacon (PLB) or satellite messenger
🔸 first aid kit
🔸 light emergency bivy
🔸 knife
🔸 matches, or lighter
🔸 sun protection: sunscreen, sunglasses
The specific gear for this trail – and in general for any winter hike:
🔸 microspikes: always carry microspikes with you even for a snowshoe trip; they are beneficial on well-packed snow or icy parts.
🔸 waterproof jacket, waterproof pants, or at least gaiters.
🔸 gloves, toque, extra socks
🔸 hiking poles – in winter, you can add snow baskets. I rarely use hiking poles, but in challenging terrain, they are quite helpful.
🔸 Insulated water bottle with warm tea or coffee ☕️

How to get there?
Turn right off Hwy 99, 13 km north of Whistler. The parking lot is located 2 km from Hwy 99 along a Forest Service road. No need 4W4 vehicle.
In winter, the parking lot is not plowed (as of January 2021)
Direction here.
Links:
📌 All Trails map and reviews from hikers
🏕 BC parks information


I am absolutely stunned by the quality of your blog, I haven’t seen anything like it! I will be coming here to plan some adventures 🙂
LikeLike
Thank you so much Niklas! You motivate me to continue publishing 🙂
LikeLike